Guide: Easiest way to restring a guitar?

My latest question asks:

Hi Aaron, I always find it hard to restring my guitar. I never know how much string to cut off and it’s always left tangled and leaves my guitar with tuning problems. Can you show me some tips and tricks for the easiest way to restring a guitar? Thank you.

Thanks for your question. It’s very important to restring your guitar correctly, as many problems such as rattles and buzzing can occur from strings fitted incorrectly.

Tools - Copy
A good set of Wire Cutters, a Peg Winder and a Clip-on Chromatic tuner will help you through these steps.

I will list some very detailed steps here, which in my opinion show the easiest way to restring a guitar. There are many different ways people prefer, but in my experience this way is the easiest. It still requires patience and practice, but with time regular string changes should become much easier by following these steps.

Estringdownwards

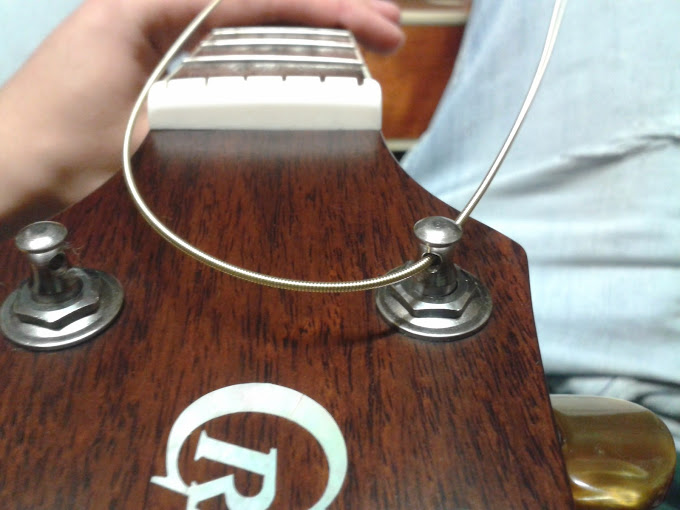
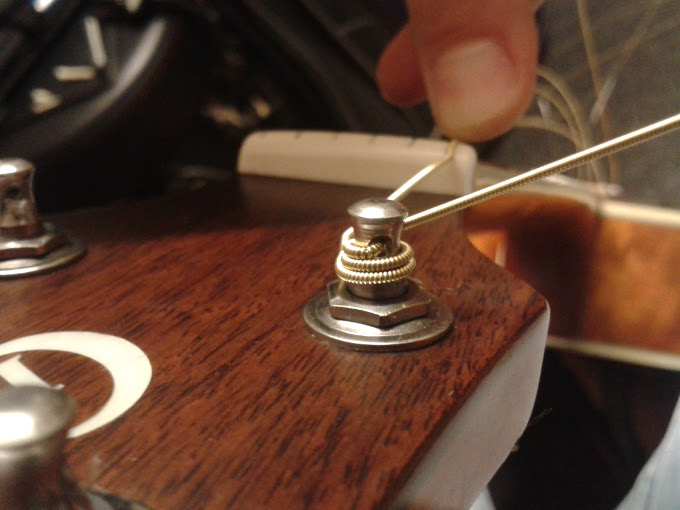
  • Step 1: I will first show you how to fit the thicker E, A and D wound strings onto your guitar. The first step is to turn the machine head until the hole is pointing downwards towards the guitar neck. Once the string is secured at the bridge end of the guitar (via Acoustic Bridge Pin, Electric Tremolo or Tailpiece etc) you can then thread the other end of the string downwards through the hole.


Thickstringhand - Copy

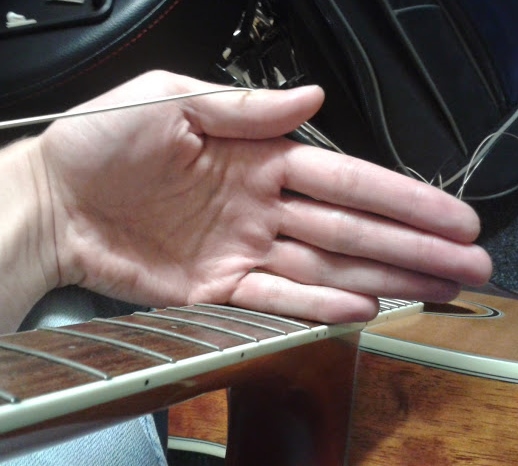
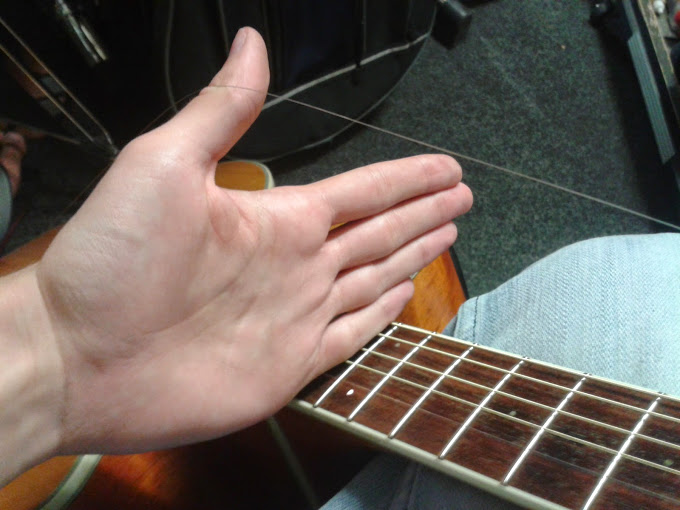
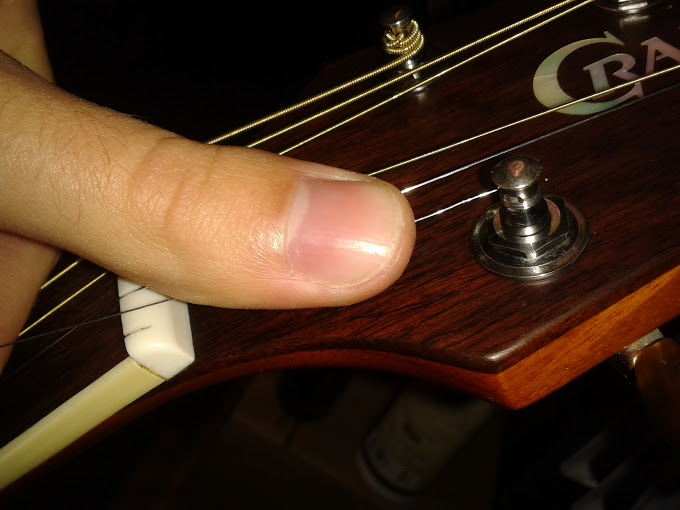
  • Step 2: The next step is to position your hand on the 12th Fret of the guitar as shown in the picture above. Pull the string through the hole with your hand still in this position, so you have roughly 4 inches of slack string between your hand and the guitar fingerboard.


Estringbent

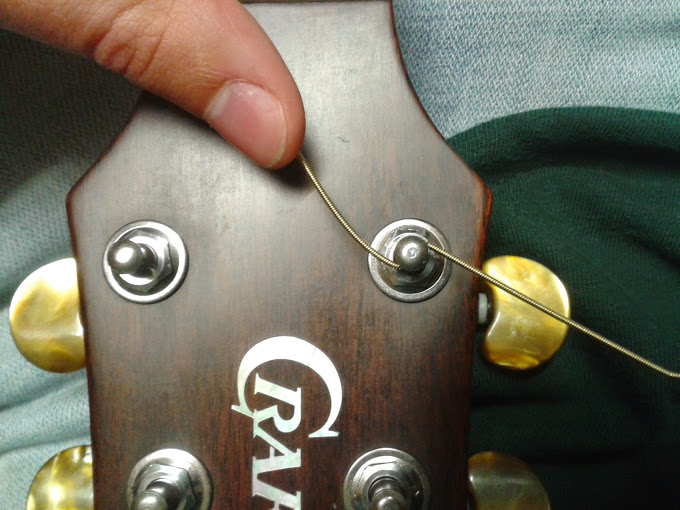
  • Step 3: Once you have enough slack on the string from the previous step, you can then secure the string in the machine head. First bend the side of the string which is attached to the bottom of the guitar, down towards the fingerboard. Then bend the other end of the string in the opposite direction facing up towards you as shown in the picture above.


Estringwrapped

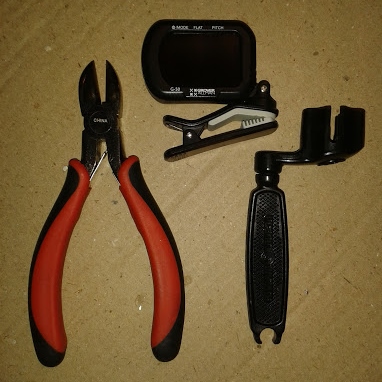
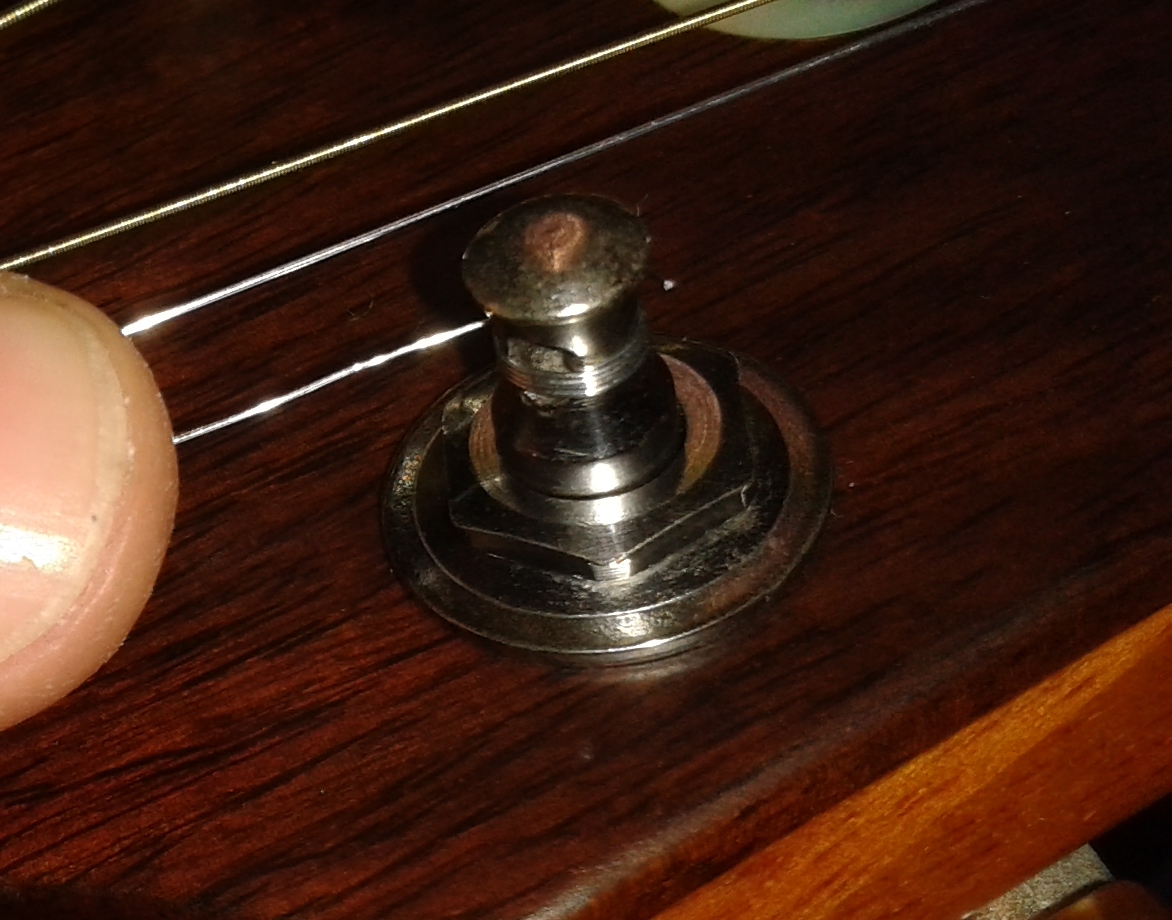
  • Step 4: Once the string is secured in the machine head from the previous step, you can now start to guide the string using your thumb or finger, down around the machine head. Hold the string with one hand and turn the machine head slowly with your other hand, be careful as the remaining sharp end of the string will also turn around with the machine head. To speed up this process you can use a peg winder; this will turn the machine head much quicker than doing it by hand. It’s important to ensure that the string is wrapping around the machine head in a downward spiral towards the headstock, you can guide it down with your thumb or finger. If you have followed Step 2, there should be roughly 2 to 3 windings of string on the machine head when tight. Don’t tune the string up to pitch yet, but tighten it enough so that it sits securely in the guitar nut.


Estringcut

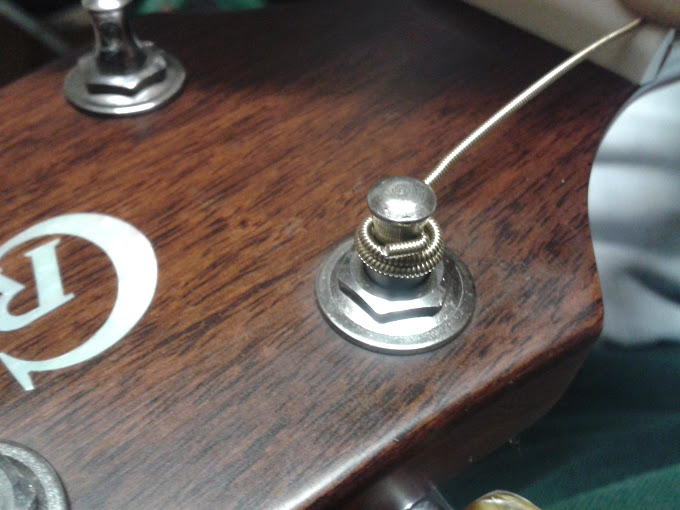
  • Step 5: Once you have the correct number of windings and the string is tight enough to fit securely in the guitar nut, you can cut the remaining pointed end of the string off. I recommend using wire cutters and to leave about 2mm of string remaining to ensure the string is then secure and will not slip. You can then bend the remaining 2mm of string around the machine head, this will stop it from protruding out and accidentally sticking into fingers.

Follow Steps 1 to 5 when fitting the thicker E, A and D wound strings onto your guitar. For the thinner G, B and thin E Strings use Steps 6 to 10 below, it’s the same method as earlier but I’ve included some extra helpful tips.

ThinEhand

  • Step 6: When fitting the thinner G, B and thin E strings onto your guitar, follow the previous Step 1. Then follow Step 2 but when positioning your hand on the 12th Fret of the guitar as shown in the picture above, pull the string through the hole with your hand still in this position, you should have roughly 5 to 6 inches of slack string between your hand and the guitar fingerboard. It is better to leave this extra slack for the thinner G, B and thin E strings, as they usually slip more and need to be more secure in the machine head.


ThinEbent

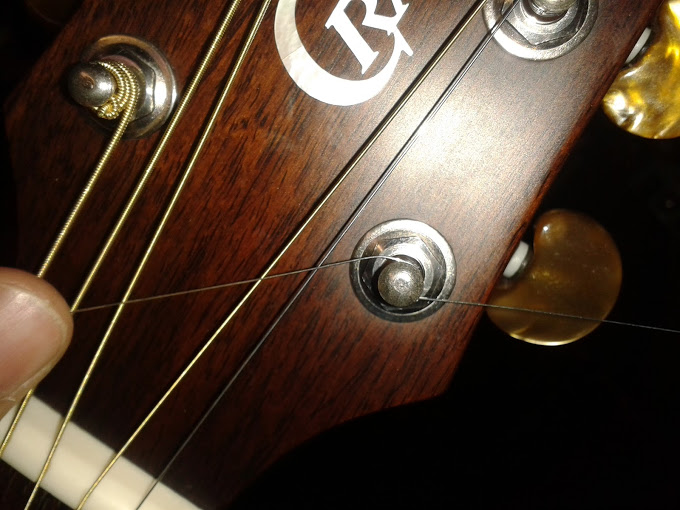
  • Step 7: Once you have enough slack on the string from the previous step, you can then secure the string in the machine head. First bend the side of the string which is attached to the bottom of the guitar, down towards the fingerboard. Then bend the other end of the string in the opposite direction facing up towards you as shown in the picture above.


ThinEwrapped

  • Step 8: Once the string is secured in the machine head from the previous step, you can now start to guide the string using your thumb or finger, down around the machine head. Hold the string with one hand and turn the machine head slowly with your other hand, be careful as the remaining sharp end of the string will also turn around with the machine head. To speed up this process you can use a peg winder; this will turn the machine head much quicker than doing it by hand. It’s important to ensure that the string is wrapping around the machine head in a downward spiral towards the headstock, you can guide it down with your thumb or finger. If you have followed Step 6 then there should be roughly 1mm to 2mm of windings of string on the machine head when tight. Don’t tune the string up to pitch yet, but tighten it enough so that it sits securely in the guitar nut.


ThinEwound

  • Step 9: Once you have the correct number of windings and the string is tight enough to fit securely in the guitar nut, you can cut the remaining pointed end of the string off. I recommend using wire cutters and to leave about 2mm of string remaining to ensure the string is then secure and will not slip. You can then bend the remaining 2mm of string around the machine head, this will stop it from protruding out and accidentally sticking into fingers.
  • Step 10: Once all of the strings have been fitted, we recommend using a clip on chromatic guitar tuner to tune all of the strings up to their correct pitch. Once all of the strings are in tune, you can carefully stretch each individual string up and down the neck by gently pulling it a few millimetres away from the fingerboard; this will help to keep the strings in tune after a string change. The strings will usually take a couple of days to settle in after a string change, for this reason we recommend changing strings a few days ahead of an important gig.

I hope that these steps will help you when changing your guitar strings from now on. Be sure to check out the Tech Tips page regularly for future updates and helpful tips.

Advice: Electric Guitars

An Electric Guitar should be checked, adjusted and set up prior to purchase. This should be done by the retailer and is one of the benefits of buying from a shop offering this service rather than privately. Basic points are the straightness of the neck, correct action (height of strings from the frets), the intonation (length adjustment between nut and saddle), even frets, and the overall playability of the instrument.

We recommend that Guitars should be inspected and re-adjusted if necessary. This is extremely important due to any faults that may develop during this time. Customers should be especially careful when storing or leaving the guitar near heat sources such as radiators or when stored inside a car in hot weather. Extreme temperatures can warp or bow the neck. When warped or bowed, the neck might not straighten by using the standard adjustment of the truss rod and could need major expensive repairs. We always recommend to customers, if their guitar neck does need adjusting then it should be carried out by our Guitar Technician at our shop. The reason for proper adjustment is due to it being extremely hard to tell which way the neck is moving and how much tension is needed, improper adjustment can lead to irreparable damage to the neck. An electric guitar if treated with good care should provide a very good investment.

There are many different types and styles of Electric Guitars, with some more suited to rock style playing and others for more general usage. Advice on what to buy and which would best suit your style of playing is crucial, bad advice or a bad purchase could hinder or even end someone’s playing enjoyment before it begins. The customer should spend as much as they can comfortably afford and set themselves a budget when purchasing an instrument. This will give the customer the best chance to learn and progress in playing the Guitar.

Advice: Bass Guitars

The same advice which applies to an Electric Guitar (See Electric Guitar Advice) is probably more important with a Bass. Due to a Bass Guitar having thicker strings which applies greater tension to the neck, this means a good set up and playability is crucial.

The neck might have to be adjusted every time a different weight and gauge of string is used for example changing from an extra light gauge to a standard gauge. Basses come in all shapes and sizes, which again mean some suit different styles of music. Basses can be purchased with active pickups and pre amps, this helps in certain situations to provide a wider range of tone and extra power.

Five string and six string basses are also available for purchase. Unlike an electric guitar a bass guitar player will have to accompany another instrument at some point. The Bass Guitar is not a solo instrument and it relies on its role to accompany drums and other instruments. As with purchasing an electric guitar the customer must first set a budget, this may need to be slightly higher because bass guitars tend to be a little more expensive.

Advice: Acoustic Guitars

The same advice which applies to an Electric and Bass Guitar (See Electric or Bass Guitar Advice) also applies to an Acoustic Guitar, but with much more emphasis on set up and playability. Acoustic guitars tend to have wider or fatter necks, if the strings are too high and the guitar is badly set up then it will be near impossible to play.

Acoustic Guitars do not have as many adjustment features as electric guitars for example they have fixed bridges making them harder and more time consuming to work on. Their Plastic or bone composite saddles have to be filed by hand to adjust the action. This means the setup cost will increase unless the shop will carry out any adjustments for free like Modern Music’s twelve-month warranty period. A Different gauge of strings may mean the neck would have to be readjusted due to the added or decreased tension on the neck. We advise all Guitar actions are thoroughly inspected before purchase.

Advice: Amplification

Electric Guitar Amp Advice:

There are many different types of lead amplification available. Amplifiers can be sold separately as a speaker cabinet and an Amplifier Head or as a combined unit called an Amp Combo. An Amp Combo is a combination of the Amplifier Power Head and any amount of speakers all in one unit. Most Amplifier set ups only produce enough sound for one guitar and usually feature 2 switchable channels; this is so the guitarist can select one for a clean sound and the other for any distortion. All Amplifiers vary in wattage and size and this must be taken into consideration when being purchased for a certain use e.g. home use, practising or gigging. Some may be suited for different genres of music better than others, but most Amplifiers these days will give a much wider range of tone.

Much care should be taken when purchasing an Amp not to cut corners just to save money. Cheap Amplifiers cannot be driven as loud/hard as Amps in a higher range. This can lead to the customer having to purchase a more expensive amp in the future. Some manufacturers offer up to a three-year warranty period as standard, this may be one of the attractions when buying a brand new Amplifier opposed to one that’s Second hand and may save money in the long run.

Bass Amp Advice:

Bass Amplification is one of the most difficult areas when deciding which Amp to buy. It’s crucial to make the right decision as money can be wasted far easier in this department than any other. Low-end bass frequencies are known to be difficult to amplify and must not be overdriven, therefore the right size of speaker(s) and wattage must be adequate for the job at hand.

Do you need standard or graphic tone controls? Will you need a compressor? All these questions have to be answered when a Bass Amp is purchased. If the wrong Bass Amplification is purchased it could lead to major problems. Good advice is essential, for example if a Bass Amp has an extension speaker socket then an extra cabinet can be added for more power and better spread of sound, this also means that it is unlikely the unit will produce the full wattage when used on its own.

Advice: PA Systems

In most small venues, the PA works as a sound reinforcement system, helping to boost the sound of the vocal and solo instruments. In larger venues, it may also be used to amplify all the back line sound including the drum kit and each individual drum.

As a wide range of sounds need to be dealt with, PA speakers must be able to reproduce the full audio spectrum, but the PA’s main job is to lift vocals over the audio level of the back line.

In a very reverberant room, getting a clear vocal sound can be difficult. As you move closer to the back of the room, the more reverberant sound can overwhelm the direct sound which reduces vocal clarity.

To reduce the risk of feedback the main PA speaker cabinets should be positioned in front of the vocal microphones. The speakers should be set up on stands slightly above the audiences head height and angled slightly downwards. This will concentrate all of the sound in the direction of the audience and not towards the back wall or ceiling. If the speakers are aimed away from any close walls it will reduce the effect of room reflections making the sound clearer, even in smaller more troublesome rooms.

Many bands use backing tracks from CD’s or MP3 players. If the main PA speaker cabinets are in front of the band they may have trouble hearing this backing track. This can cause the band to turn the PA speakers inwards or move the microphone forward so they can hear the backing track. If this action is carried out then next thing they will experience is feedback; this is not a problem with the mixer or the speakers, but is due to the sound the speakers produce looping back into the microphone. If the band needs to hear any type of music whilst performing they will need some form of monitoring system.

Advice: Effects Units

Guitar effects processors are units that enhance the guitar signal and change the sound into hopefully something altogether better. Most musicians use some sort of enhancement effects these days in recording and live work. Some notable examples are The Police who commonly use the Flanger effect and Bryan Adam’s Chorus sound. You can buy separate Effects Units or Multi Effects Units which contain most of the sounds in an “all in one” package. The prices of Multi Effects Pedals these days are quite low and start from just £49.00.

If you are unsure that you will use all of the sounds on a Multi Effects Pedal then we advise you buy Single Effects Pedals and build them up, although this will work out to be more expensive. Make sure you know how they work and you purchase one from a shop that will support you with any additional help needed.

Advice: Drums

Here are some Top Tips by Dave who runs our Drum Department:

Drums never sound the same behind the kit as they do in front of it. In an un-mic’ed situation if you over dampen your toms and bass drum they may not be heard.

In choosing new crash cymbals make sure they are suitable for your playing style. If you are a hard hitter and purchase a thin crash it may crack, the same applies to a lighter player where a heavy crash would not react quick enough.

There are no hard and fast rules with drumming. Some of the world’s greatest drummers have done some unusual things with playing and equipment, so remember if anyone tells you their way is the only way then it’s just their opinion.

The main differences between single and double ply heads are sound and durability. A single ply head has more tone and sensitivity but will not hold up to heavy playing. A double ply head has a fatter, warmer controlled sound and is more durable.

If you break sticks frequently and it’s becoming too expensive you have 3 options: Change to a heavier stick, change to a synthetic stick e.g. graphite or if both these options do not appeal then buy cheaper seconds sticks in bulk.

If you find yourself becoming tired after only a short time playing then try relaxing your muscles. Also try to concentrate on the sound you are producing and not how hard you are playing.

Try not to sit too high or too low, your legs should bend at right angles at the knee and not be straight.

There are now special bass drum heads which produce more volume with less boom. The sound will not project if you put in too much damping and you’re not mic’ed up.

If you play your Hi-Hat cymbals with the shaft of the stick your sticks will chew up quicker. Try lowering the cymbals and if a semi open sound is needed then you can achieve this with different foot pressures on the pedal.

If you strike your crash cymbals directly on the edge when playing them hard, the shock will transfer straight to that area and could produce a crack. However if you use a sideways motion the shock will be dispersed around the circumference. It is important to try and keep your crashes loose on the cymbal stand.

Replacing your felt Hi-Hat clutch washers with rubber ones will produce a bigger sound.

If you find that it is difficult to hear your drums at loud gigs then try not to set up in front of the backline amps. If you can get your guitarist and bass player to bring their amps forward, positioning your drum kit to the side of them then this will improve your sound.

Finally it’s best to always wear earplugs when playing to save your long term hearing, as “Improved Hearing” is about the only thing Modern Music doesn’t sell!